Choosing outdoor cooking tools can transform a cold campsite meal into a dependable, enjoyable routine. Yet attractive gear often hides practical weaknesses. A compact stove may boil water quickly but fail in strong wind. A heavy pan may cook evenly but burden a long hike. Understanding how to choose tools for outdoor cooking means matching equipment to terrain, meals, weather, and cooking skill. This guide presents ten practical tips based on camping experience, food-safety guidance, and manufacturer recommendations. Real judgment matters.
Begin with the meal, not the shopping list. A backpacking breakfast needs a lightweight pot, while family grilling may require sturdy tongs, a larger grate, and heat-resistant gloves. Check fuel availability before leaving home. Test the stove outdoors, inspect connections, and keep cookware stable on uneven ground. Small details prevent major problems. Handles should remain cool, lids should fit securely, and cleaning should not require excessive water. Stainless steel offers durability, while aluminum reduces pack weight. Each choice involves compromise.
Weather deserves serious attention. Wind can waste fuel, scatter ash, and make flame control difficult. Rain can turn a pleasant cooking area into slippery ground. Choose tools with reliable grips and store food in sealed, clean containers. Avoid placing hot equipment near tents, dry grass, or crowded walkways. Local fire restrictions and park rules must always guide your setup. Some advice may not suit every trip, and personal testing can reveal uncomfortable mistakes. That is useful. Review your gear after each outing, note what failed, and improve before the next adventure.
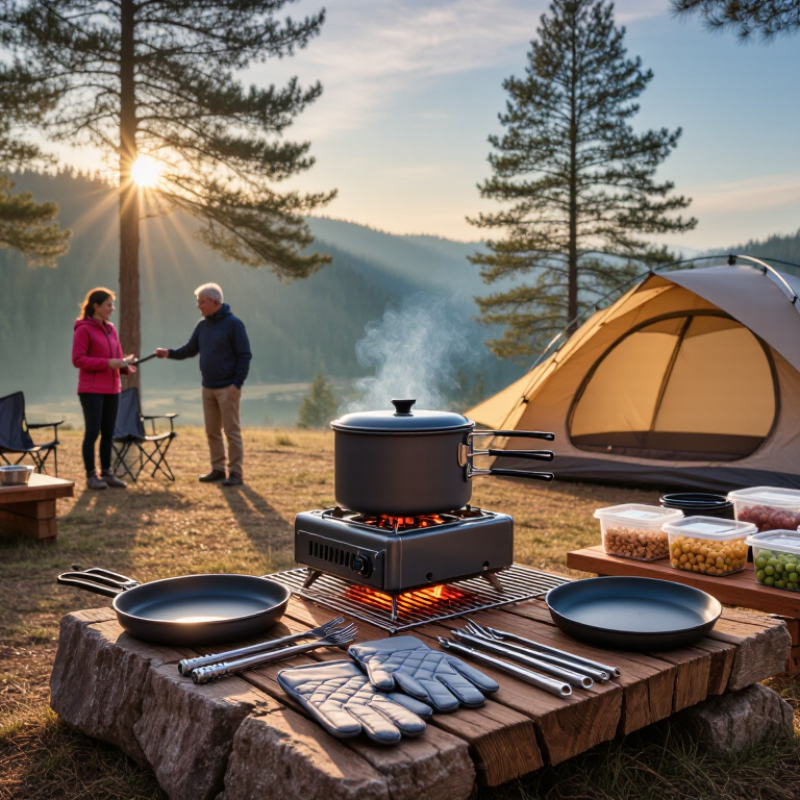
Before choosing outdoor cooking tools, define what you will actually cook outdoors. A simple meal plan prevents unnecessary equipment and wasted space. Consider breakfast, lunch, dinner, snacks, and drinks for each day. A breakfast of eggs needs a pan, while oatmeal needs only a pot and spoon. Fresh fish may require a grill surface and reliable heat control.
Tip: Write a three-day meal plan before shopping for tools. Match every utensil to a planned dish. Keep it practical. Pack less. My early camping menus were too ambitious, with sauces, baked dishes, and fragile ingredients. They looked impressive on paper but created extra cleaning and preparation. Now I choose meals with shared ingredients, such as vegetables used in both breakfast and dinner.
Think about cooking conditions, not just recipes. Wind can cool a flame, rain can delay preparation, and uneven ground can make a hot pot unstable. Choose tools that fit your cooking method and meal volume. If two people share meals, a compact pot may be enough. Larger groups need stronger handles, stable surfaces, and easier serving tools. Check heat resistance, grip quality, cleaning needs, and storage size before buying.
Tip: Test your planned menu at home using only the tools you intend to carry. This exposes problems early. I once discovered that my favorite pan was too shallow for a full meal. That small mistake changed my packing habits. Reliable outdoor cooking comes from realistic planning, not collecting the most equipment.
| No. | Outdoor Cooking Need | Typical Meal Plan | Recommended Tool | Useful Specification | Selection Tip |
|---|---|---|---|---|---|
| 1 | Boiling water and preparing simple hot drinks | Tea, coffee, dehydrated meals, or instant oatmeal | Lightweight camping kettle or small pot | Approximately 0.75–1.5 L capacity for small groups | Choose a heat-resistant handle, secure lid, and compact nesting design. |
| 2 | Cooking one-pot meals for a small group | Pasta, rice dishes, soup, chili, or stew | Lidded camp cooking pot | Approximately 2–4 L capacity for 2–4 people | Use a stable base and a lid that helps reduce cooking time and fuel use. |
| 3 | Preparing foods that require even frying | Eggs, pancakes, vegetables, fish, or grilled sandwiches | Portable frying pan or skillet | 20–25 cm diameter for common camp meals | Select a flat, stable base and a removable or folding handle for storage. |
| 4 | Cooking over a campfire or charcoal heat | Skewers, foil-wrapped vegetables, sausages, or toasted bread | Long-handled tongs and fire-safe grill grate | Heat-resistant handles with a practical reach of about 30 cm or more | Prioritize locking tongs, corrosion-resistant metal, and a secure cooking surface. |
| 5 | Preparing fresh ingredients at the campsite | Salad, chopped vegetables, fruit, or stir-fry ingredients | Compact cutting board and utility knife | A board around 20 × 30 cm offers a useful portable work area | Choose a non-slip board and a knife with a protective sheath for safe transport. |
| 6 | Serving meals efficiently to several people | Family-style pasta, rice, grilled foods, or shared sides | Serving spoon, spatula, and heat-resistant tongs | One serving set per main cooking vessel helps reduce handling time | Use utensils with hanging loops or compact storage cases to keep the camp kitchen organized. |
| 7 | Reducing packed weight for hiking or backpacking | Dehydrated meals, instant grains, and hot drinks | Ultralight pot set with nesting utensils | A compact set weighing roughly 0.5–1.0 kg can suit lightweight trips | Compare total packed weight, not only the weight of the largest pot. |
| 8 | Cooking larger meals at a drive-in campsite | Steaks, grilled vegetables, burgers, or group breakfasts | Portable stove, large skillet, or two-burner cooking setup | A 25–30 cm cooking surface supports multiple portions | Choose a stable frame, adjustable heat control, and enough surface area for the planned menu. |
| 9 | Keeping food preparation hygienic | Raw ingredients, ready-to-eat foods, and meals prepared in stages | Food-safe storage containers and separate preparation tools | Use leak-resistant containers and separate raw-food and ready-food surfaces | Select washable materials, tight-fitting lids, and containers that can be clearly labeled. |
| 10 | Cleaning up quickly while minimizing campsite impact | Any meal, especially oily or sauce-based dishes | Scraper, biodegradable soap, sponge, and waste bags | A compact cleanup kit should include tools for scraping, washing, drying, and packing waste | Favor smooth, easy-clean cookware and plan to pack out all food scraps and wastewater as required locally. |
Stainless steel resists moisture and cleans easily after smoky meals. Cast iron holds heat steadily but weighs more and can rust. Aluminum is light, though it may bend sooner. No material wins everywhere.
Inspect the hinge, rivets, welds, and narrow joints. Press the tool against a pan. It should resist bending without feeling stiff. Thin coatings may chip.
Choose heat-resistant, non-slip handles with rounded edges. Test the grip with damp hands. Keep silicone or wood away from direct flame. Small detail. Big difference.
Hold it at cooking height for thirty seconds. Notice wrist pressure and balance. Try opening locks without force. A heavy tool may feel durable but become tiring quickly.
Wash them with hot water and mild soap while residue remains soft. Use a small brush for grooves and narrow joints. Dry every surface completely. That matters.
Dry the tools before sealing them in a container. Use separate sections for sharp, greasy, and delicate pieces. Store damp cloths elsewhere. Wet storage causes odors and corrosion.
Look for a secure hinge, balanced weight, and suitable reach. Long handles protect hands but can reduce control in crowded spaces. Loose hinges are risky near hot surfaces.
Not always. Compare durability, cleaning effort, repair options, and replacement parts. Fewer dependable tools may outperform a crowded kit. I once trusted appearance and ignored the hinge. It failed.
Choosing the right equipment can make outdoor meals more convenient, enjoyable, and reliable. Start by considering your cooking needs, preferred meal plans, group size, and the locations where you will cook. To understand how to choose tools for outdoor cooking, compare materials carefully, focusing on durability, heat performance, weight, and resistance to changing weather conditions. The best tools should match your cooking style without adding unnecessary bulk.
Fuel compatibility is also important, so confirm that each tool works with your intended cooking system. Check its size, portability, and storage requirements before purchasing. Safety features, stable handles, secure lids, and comfortable operation can improve control and reduce accidents. Finally, consider how easy the tools are to clean, dry, store, and maintain. A slightly higher initial cost may offer better long-term value if the equipment lasts longer, performs consistently, and supports a wide range of outdoor meals.

 DRS Boards